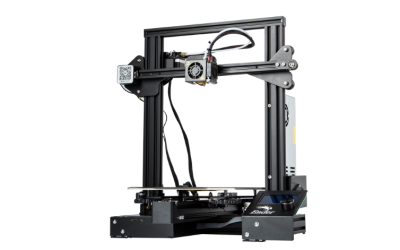
Why FLSUN V400?
FLSUN V400 was the starting of the new generation of pre-assembled 3D printers. V400 was first pre-assembled printed that can be compared to Voron, which requires a good knowledge about 3D printers in terms of software, hardware and takes to be assembled few days up to one week.
FLSUN V400 came with a speed of 400mm/s and acceleration of 8000mm/s ². V400 is modified with Klipper that gave it the ability of running at a high speed with a great qulity. The last set, which made the V400 a complete printer for high speed is the Delta framed design in addition to the carbon fiber rods.
So, why Flsun? Flsun came fully modified for running at high speed with great quality unlike other many printers in the market which requires huge amount of effort and upgrades to reach a good quality. Although the V400 came as a well designed printer it can be updated mostly in terms of the software since Klipper is being updated often. In this article SWbAC engineers will suggest updates for your FLSUN V400.

Cura Profile
The original cura profile for FLSUN V400 had many issues which represent the printed in a bad way. SWbAC team worked on a profile that solve the following issues:
1. Hitting or scratching the object while printing.
2. Hard Support to be removed.
3. Infill type.
4. Z retraction.
The profile can be downloaded from the link to the right. Also, please enjoy the Youtube video that shows the difference between the original profile and SWbAC’s one.
Pressure Advance Tuning
First you need to send the following setup commands (Modified for V400) in the printer IP website in the console:
SET_VELOCITY_LIMIT SQUARE_CORNER_VELOCITY=2 ACCEL=8000
TUNING_TOWER COMMAND=SET_PRESSURE_ADVANCE PARAMETER=ADVANCE START=0 FACTOR=.002
Then you need to download the pressure advance test model. Now you need to slice the pressure advance test model and modify the following setting:
Top Surface Skin Layer = 0
Top Layer = 0
Infill = 0
Make sure the model is hollow you only need to change these settings. Print the test file then measure from the bottom until the height with not defect(Error)
Use this equation to get your new pressure advance value:
pressure_advance = <start> + <measured_height> * <factor>
Ex: PA = 0 + 12.1 * 0.002 = 0.0242
inside printer.cfg and under [extruder] change:
pressure_advance = your new value
Ex: pressure_advance = 0.0242
FLSUN V400 Bed Leveling For Best First Layer
FLSUN V400 bed leveling is can be improved dramatically following few steps. The bed leveling can be easily improved in FLSUN V400 because the bed is fixed so, just few edits in the configuration file will let your printer reach a smooth first layer.
First, head to fluid by entering your IP address into the browser. Then, click machine and enter printer.cfg.
Start with searching for [probe] and change the following:
1. speed from 10 to 5. This change will improve the sufficient accuracy and the repeatability of the probe.
2. samples from 3 to 5. This change will let the probe reach the same point five times and get the average between them, which will fix any wrong readings during the bed leveling process.
Second move to [bed_mesh] and change the following:
1. round_probe_count from 7 to 23. This will increase the distance between each probe and the next one so it would get more points, which means longer time for the process of bed leveling, but with better accuracy. Note, that the number of probe count must be odd number to get the center point of the bed.
Finally, click save and restart to update the printer.cfg. This process will make the bed leveling process longer, but it will improve your first layer.
Uploading Gcode from Cura directly to the Printer
- Uploading gcode file to be printed directly to FLSUN V400 no longer requires any additional components and can be done in few steps.
- Head to Cura marketplace. Search for Moonraker and install it.
- Copy your IP address and go to manage printer in Cura. Then, click on Connect Moonraker and past your IP address in Address(URL).
- Click save.
Now you can easily upload your gcode to the printer from Cura. Also, you can add the image of your file to the screen and the web browser, which makes it easier to exclude a failure during the print or print the same file after a while if you don’t remember the name you’ve saved it with. To make add these follow these steps:
- Click on Extensions in Cura, then post processing and modify gcode.
- Click on Add script twice and make one 32px, 32px and the second 400px, 400px
After these two steps the images would be shown on the pad and the browser. Now follow these steps to know how to exclude object:
- Head to fluid by entering your IP address into the browser. Then, click machine and enter printer.cfg.
- Add [exclude_object].
- Click save and restart.
- Go to moonraker.conf
- Under [file_manger] change enable_object_processing to True.
- Click save and restart.
Hardware Upgrades For FLSUN V400
FLSUN V400 came with the best hardware items as a 3D Printer. Yet, few parts can be upgraded.
The fan duct that originally came with FLSUN V400 can be improved. You can download the file from here. Or purchase it, from this link, which was 3D printed using uv tough resin to ensure there is no leakage of the air flow.
The following video shows how to replace the fan duct.


0 Comments